More actions
jrfconvert import |
No edit summary |
||
| Line 1: | Line 1: | ||
[[Category: | [[Category:Understanding resource lists]] | ||
| | ||
Latest revision as of 07:59, 26 April 2011
Print or send resource information
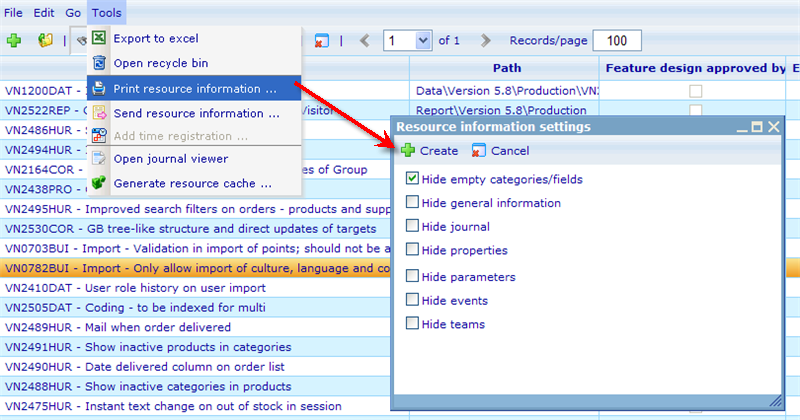
There are two features under the tools drop down on the resource list, that basically ensure the same thing. Namely that it is easy to take information from a resource and export it to external formats. These two features are the "Print resource information" and "Send resource information" options.
To use this feature, simply highlight one or more resources in a resource list, and then use one of the two buttons. Once you clicked the button a small dialog will appear where you can choose which information you want to include in the printed or sent page. As default the "Hide empty categories/fields" check box is checked, meaning that if any of the categories journal, properties, parameters, events or teams do not have any data related to them then these categories will not even be shown to be empty; simply just excluded from the final format. You can also choose to specifically exclude categories by using the other check boxes that are offered.
When using the print resource information button, you will export all the information to a simple HTML page, which you can then easily print out on paper. This is useful for bringing the information of e.g. a project or task to a meeting, without having to open the Catglobe system.
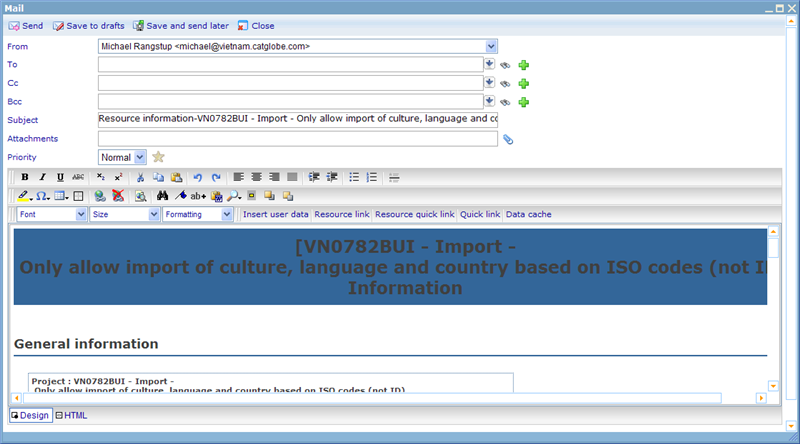
Alternatively you may also want to send the information from one or more resources to an e-mail, e.g. an external client you wish to inform of the current status of this resource. When using the send information feature you will open the e-mail editor with all the resource information pasted into the subject and main text area as shown in the example below. From here you simply fill in the remaining information and click the send button.


