More actions
No edit summary |
No edit summary |
||
| Line 26: | Line 26: | ||
More info on below table: | More info on below table: | ||
[[File: wa14.png]] | |||
= Go to cost bill list = | = Go to cost bill list = | ||
Latest revision as of 10:26, 18 November 2021
Webshop accountant
Introduction
For supporting accountant easier checking order, voucher code … We added an extra setup to allow stored order information on cost bill resources list when an order delivered.
An order delivered can generate more than one cost bill record, number of record generated depend on amount of giftcards on that order. One resource for one giftcard.
For Automatic/API product, name (Entry no.) of the resource is the voucher code.
For manual product, name of resource will follow format: Manual-[OrderId]-[ProductRId], if more than one giftcard of same product on that order, -[number] will be plus as postfix.
Cost bill info
A cost bill resource for Automatic/API product look like this:
A cost bill resource for Manual product look like this:
The difference between resource of automatic/API product and resource of manual product just at name (Entry no.), all other parts are the same.
More info on below table:
Go to cost bill list
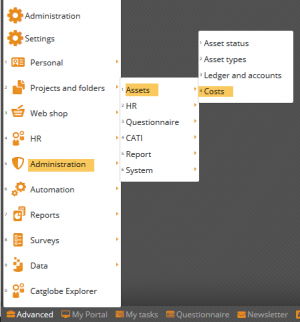
The cost bill list is placed at Advanced/Administration/Assets/Costs
Here showing all delivered voucher code of all product Automatic and API
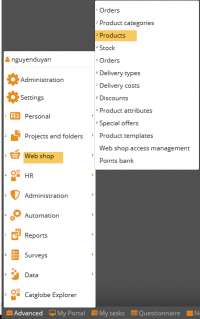
Or on cost bill tab of each product:
Under product, only show delivered voucher belonging to the product (Automatic/API)
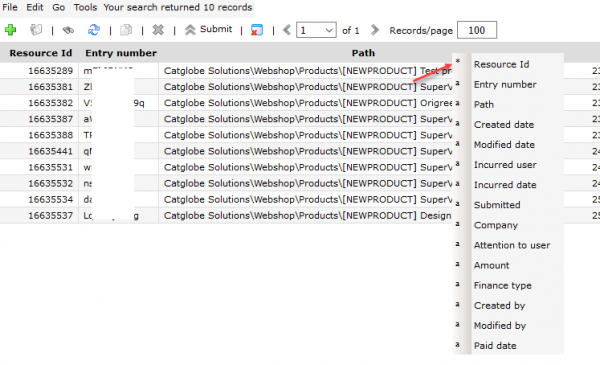
Show/hide columns on list
On cost bill list, can show/hide any columns by right click on header of list and select/deselect items:
Filter cost bill list by search feature
Can filter list by searching voucher code, supplier, order number, or order delivered date…
Please noted that, on searching, Entry number (voucher code) show as Name
Export cost bill list to excel
To export the list to excel, select Export to excel on Tools menu (filter condition and show/hide columns also effect when exporting)
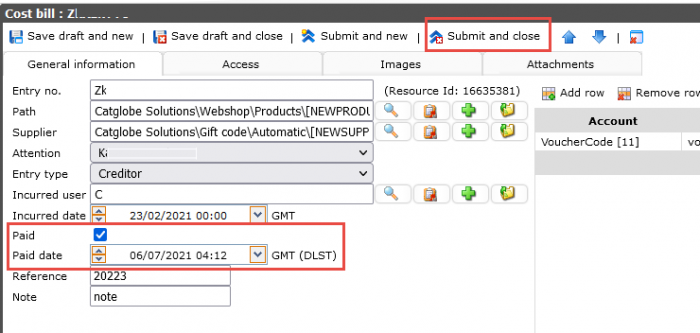
Set the cost bill to paid
When a voucher code is already paid the supplier, can mark it as paid by:
- Ticking on Paid checkbox: when paid checkbox checked, paid date will automatically fill in current date time.
- Or you can select any date on Paid date filed.
Then click on button Submit and close for saving
Can set paid directly on list by:
Select the record on the list, then click Submit button on tool bar
Double click on Paid date to set date


